

Courses and modules
Courses and modules organize your slides and hold the context they share, such as a course’s objectives or a module’s reference material. This page is for course authors who build more than a few slides and want to write that context once.
How content is organized
Section titled “How content is organized”SlideMind uses a three-level hierarchy: Course → Module → Slide. A slide is one AI interaction that you configure in SlideMind (not a Storyline slide).
- A course groups modules and slides that share the same context.
- A module groups related slides around a subject. It can be attached to a course or stay independent.
- A slide can live in a module, directly in a course (a course-level slide), or on its own.
You don’t need a course to start. A slide works on its own, and you can attach it to a course or a module later from Slide details in the slide editor.
Where a slide lives decides which context it can use:
| Where the slide lives | Context it inherits |
|---|---|
| In a module attached to a course | The module’s subject and context, and the course’s theme, objectives and content |
| In an independent module | The module’s subject and context |
| At course level | The course’s theme, objectives and content |
| On its own (independent) | None |
Create a course
Section titled “Create a course”- Go to Courses and select New course.
- Enter the Course title, then select Create course. The course page opens.
- Fill in the fields you need, then select Save course.
Course fields
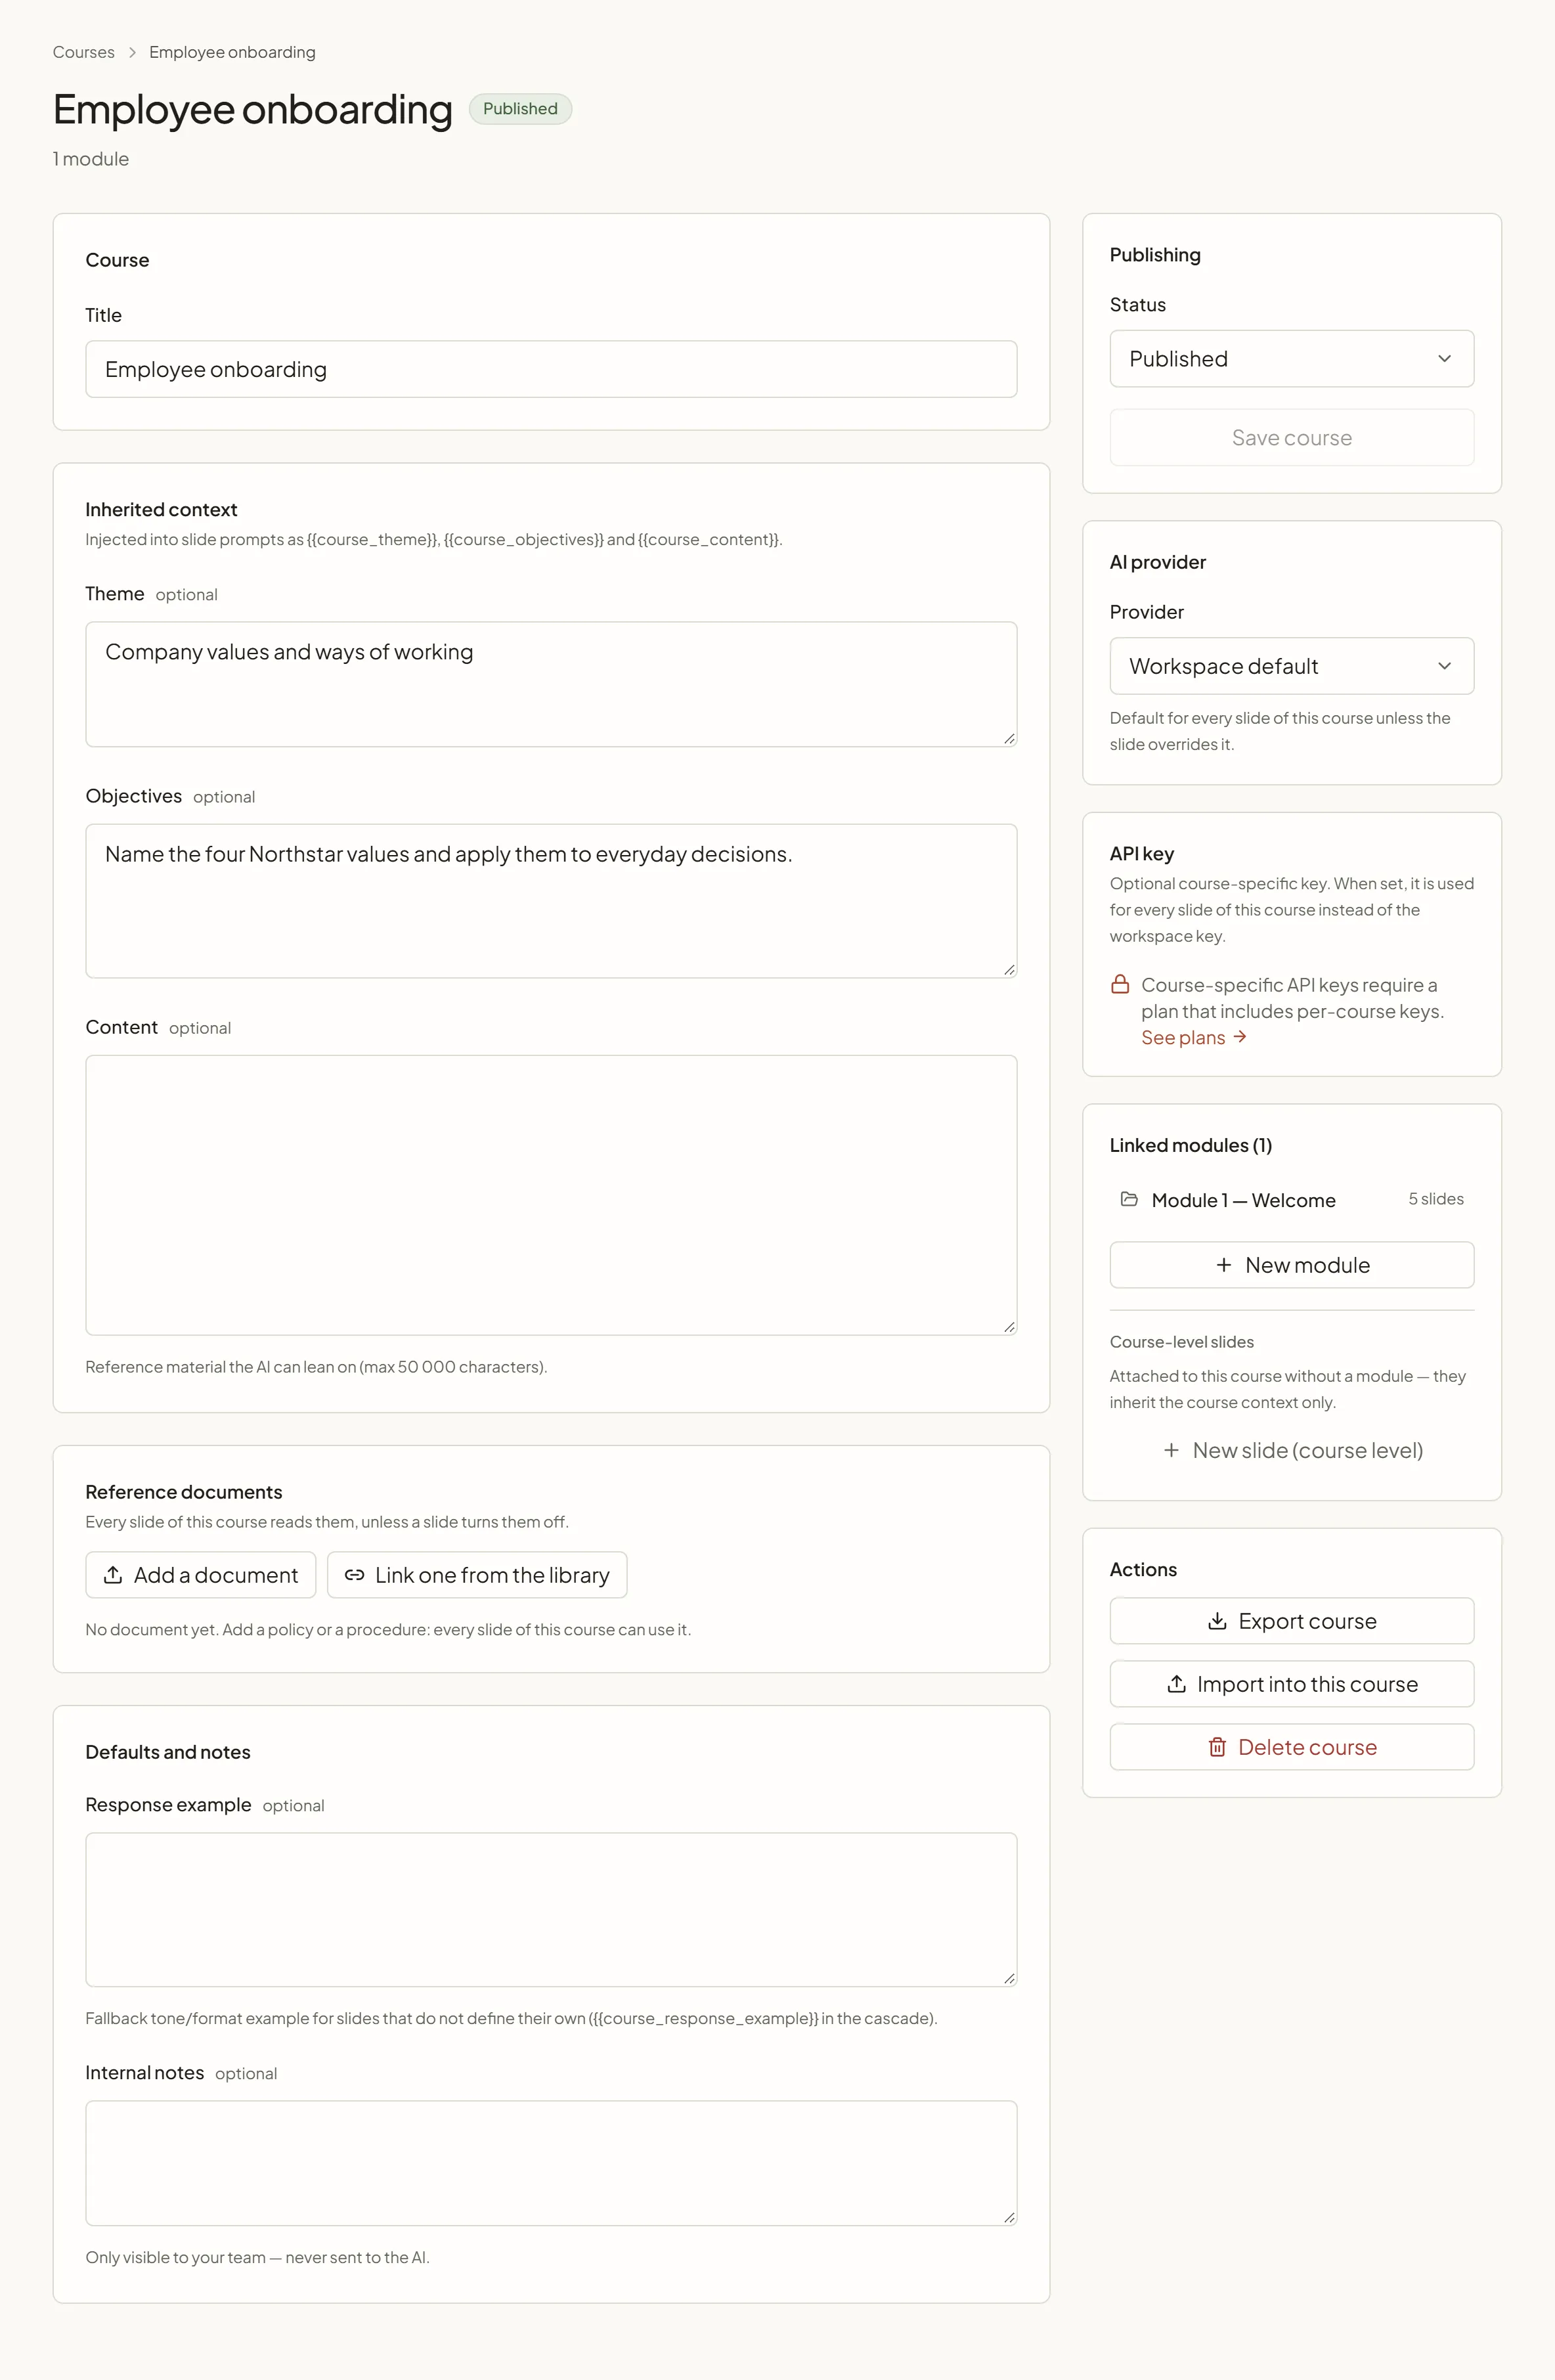
Section titled “Course fields”| Field | What it does | Example |
|---|---|---|
| Title | Names the course in the portal. | Employee onboarding |
| Theme | Available in slide instructions as {{course_theme}}. | Corporate onboarding for new employees |
| Objectives | Available as {{course_objectives}}. | By the end, learners can explain the company values. |
| Content | Reference material the AI can lean on, up to 50,000 characters. Available as {{course_content}}. | Your code of conduct, a procedure, a glossary |
| Response example | An example answer you can reuse in the slides of this course with {{course_response_example}}. See Write the AI instructions. | A short, encouraging feedback paragraph |
| Internal notes | Notes for your team. Never sent to the AI. | Reviewed by the compliance team in March |
The course page also has these sections on the side:
- Publishing: the Status of the course and the Save course button, inactive until you change a field.
- AI provider: a Provider recorded on the course and shown under its title. Slides don’t take their provider from this field: each slide uses the provider of its AI model step, or the workspace default. Check that step on each slide.
- API key: an optional course-specific provider key. When set, it is used instead of the workspace key for the slides of the course that use the same provider. It applies when the workspace uses its own provider keys, and only the workspace Owner can manage it. See Your own provider keys.
- Linked modules: the modules of the course and a New module button. Below them, Course-level slides lists the slides attached to the course without a module, with a New slide (course level) button.
- Actions: Export course, Import into this course and Delete course. See Import and export.
Create a module
Section titled “Create a module”- Go to Modules and select New module. From a course page, use New module in Linked modules instead: the course is preselected.
- Enter the Module title. Under Course, choose a course or keep Independent.
- Select Create module, then open the module to fill in its fields and select Save module. Like Save course, it stays inactive until you change a field.
Module fields
Section titled “Module fields”| Field | What it does | Example |
|---|---|---|
| Title | Names the module in the portal. | Module 1 — Welcome |
| Subject | Available in slide instructions as {{module_subject}}. | Company values and code of conduct |
| Context | Reference material for this module, up to 50,000 characters. Available as {{module_context}}. | The five values, with one example each |
| Response example | An example answer you can reuse in the slides of this module with {{module_response_example}}. | A feedback paragraph in the module’s tone |
| Internal notes | Notes for your team. Never sent to the AI. | Waiting for the updated policy |
| Course (under Attachment) | Attaches the module to a course, or keeps it Independent. Its slides stay in the module when you change this. | Employee onboarding |
The module page also shows Linked slides with a New slide button, and an Actions section with Export module, Import into this module, Duplicate with slides and Delete module.
Reference documents of a course or module
Section titled “Reference documents of a course or module”Course and module pages have a Reference documents card. The documents you link there are read by the AI in the slides below them, with no variable to add to the instructions:
- linked to a course, “Every slide of this course reads them, unless a slide turns them off.”;
- linked to a module, “The slides of this module read the course’s documents and this module’s own.”
Use Add a document to add a PDF, Word, PowerPoint, text or Markdown file and link it here, or Link one from the library to reuse a document already added. Unlink stops the AI from reading a document here; the document stays in the library. A line under the list tells you whether each answer reads the documents in full or only the passages that match the learner’s question.
The Content and Context fields suit a few paragraphs you write yourself. For a policy, a procedure or a slide deck you already have as a file, use a reference document. See Reference documents.
Override the context on one slide
Section titled “Override the context on one slide”When one slide needs a different value, you don’t have to change the course or the module. In the slide editor, open the Instructions step, select Course context, and turn on Override for the field to replace. The new value applies to that slide only. See Write the AI instructions.
Find your content
Section titled “Find your content”- Courses lists every course with its objectives, its number of modules and slides, and its status. Select a row to open the course. The row’s ⋯ menu offers Edit course, Add module, Export course and Delete course. Export all and Import course(s) are in the Import / export menu, next to New course.
- Modules lists every module with its course (or Independent), with a search field. Select a row to open the module. The row’s ⋯ menu offers Duplicate with slides, Export module and Delete module.
- Slides lists every slide of the workspace. See The Slides list below.
Duplicate with slides copies the module and all its slides. The copies start as Draft, and each copied slide gets its own integration code.
The Slides list
Section titled “The Slides list”The Slides page shows a table with these columns:
| Column | What it shows |
|---|---|
| # | The slide number. |
| Slide | The title, with a line under it: the activity, the course or module (or Independent) and the date of the last update. Select the title to open the slide editor. |
| Model | The slide’s model, or Inherited when the slide uses the workspace default. |
| Calls | The number of calls learners made to the slide, as kept in the logs. |
| Status | Draft, Published or Archived. |
Select a column header to sort the table by that column; select it again to reverse the order. Use the Course and Module filters and the search field to narrow the list. On a narrow screen, the table becomes a list of cards.
For Owners and Editors, each row ends with a flask button, which opens a copy of the slide in the Sandbox, and a ⋯ menu:
- Edit: opens the slide editor.
- Copy the … code, named after the slide’s destination, for example Copy the Articulate Storyline code. For a Storyline Web Object, the item reads Download the Articulate Storyline (Web Object) folder. See Integration overview.
- Installation steps: opens the slide’s Installation step.
- Duplicate, Export and Delete slide. See Create a slide and Import and export.
Export all and Import slide(s) are in the Import / export menu, next to New slide.
Status of courses and modules
Section titled “Status of courses and modules”Courses and modules have a Status: Draft, Published or Archived.
Only the status of a slide decides whether learners get answers. The status of its course or module does not: a published slide answers learners even when its course is a draft or archived, and it still uses that course’s context. Use course and module statuses to organize your work. To take a slide offline, change the slide’s own status. See The slide editor.
Delete a course or a module
Section titled “Delete a course or a module”Deleting a course or a module never deletes slides.
- Delete a course: its modules become independent and keep their slides. Course-level slides become independent. The integration code already installed in your courses keeps working.
- Delete a module: its slides become independent slides. You find them on the Slides page, and their installed code keeps working.
Who can change courses and modules
Section titled “Who can change courses and modules”Owners and Editors create and edit courses and modules. Viewers can open them but not change them. See Members and roles.
When the owner’s account has returned to Discovery, the lists show an Editable or Read-only badge on each course and module. A read-only course, and its modules, can still be exported or deleted, but not changed. See Back on Discovery: read-only above the limits.