

Quickstart: your first AI slide
This quickstart takes you from an empty workspace to a first AI answer inside a real course. It follows the checklist at the top of the Overview, Launch your first SlideMind slide, one step at a time. It is for authors and workspace owners who are new to SlideMind.
Before you start
Section titled “Before you start”- You have a SlideMind account and a workspace. If not, see Create your account and workspace.
- Your role in the workspace is Owner or Editor. Viewers don’t see the checklist and can’t create slides.
- You have somewhere to install the slide: a Storyline or Rise 360 course you can publish to your LMS or to SCORM Cloud, or a web page where you can paste HTML.
The checklist
Section titled “The checklist”Open Overview in the sidebar. The Launch your first SlideMind slide checklist shows your progress, for example 1 of 5 complete. On the left, the current step (“Step 2 of 5”) says what to do and has a button that takes you to the right screen. On the right, the list of steps marks the current one Now.
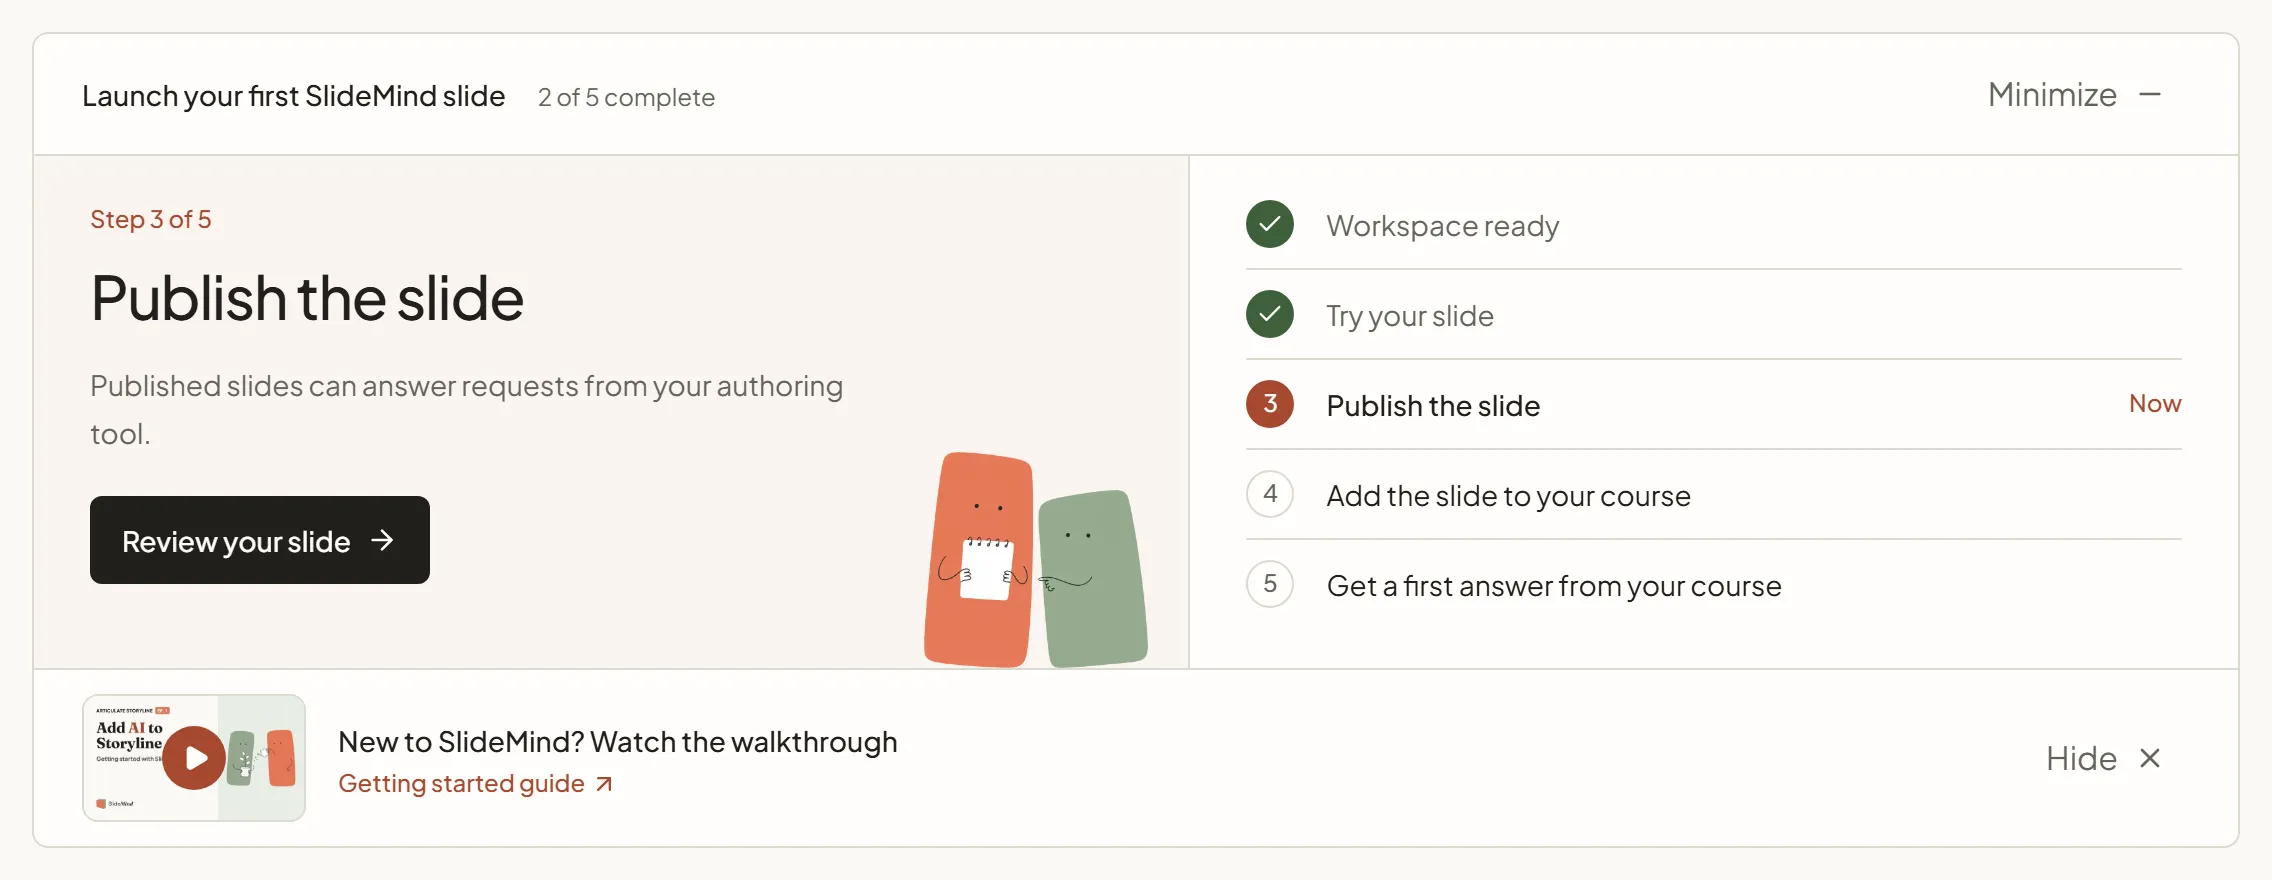
- Select Minimize to fold the checklist. It then shows only Next: followed by the current step, and its button. Select Expand to open it again. This choice is remembered in your browser.
- Progress is saved by SlideMind, so it is the same on every computer and for every member of the workspace.
- Completing a step also checks the steps before it. For example, if your first slide arrived already published, Publish the slide and Try your slide are checked too.
- When every step is done, the checklist disappears. To review the steps under Your setup is complete., select Getting started in the links at the bottom of the Overview, then select Close to fold it again.
Until your first slide is published, a short video walks you through these steps. It opens by itself on your first visit to the Overview; afterwards, select New to SlideMind? Watch the walkthrough at the foot of the checklist to watch it again. See The getting-started video.
The steps below follow the order of the checklist.
Workspace ready
Section titled “Workspace ready”This step is already checked: your workspace, role and plan are connected. In the checklist’s step list, Workspace ready links to the workspace settings.
Connect your AI
Section titled “Connect your AI”This step appears only when the workspace uses your own provider keys. New workspaces start on SlideMind Credits, with nothing to connect, so you usually don’t see it. On SlideMind Credits, the credits card of the Overview tells you when the balance needs a top-up.
- Owners: select Connect a provider. It opens Settings › AI & models. See Choosing how AI is funded.
- Editors: ask a workspace owner to connect an AI provider.
Try your slide
Section titled “Try your slide”You create a slide from a ready-made example and send it a first test message.
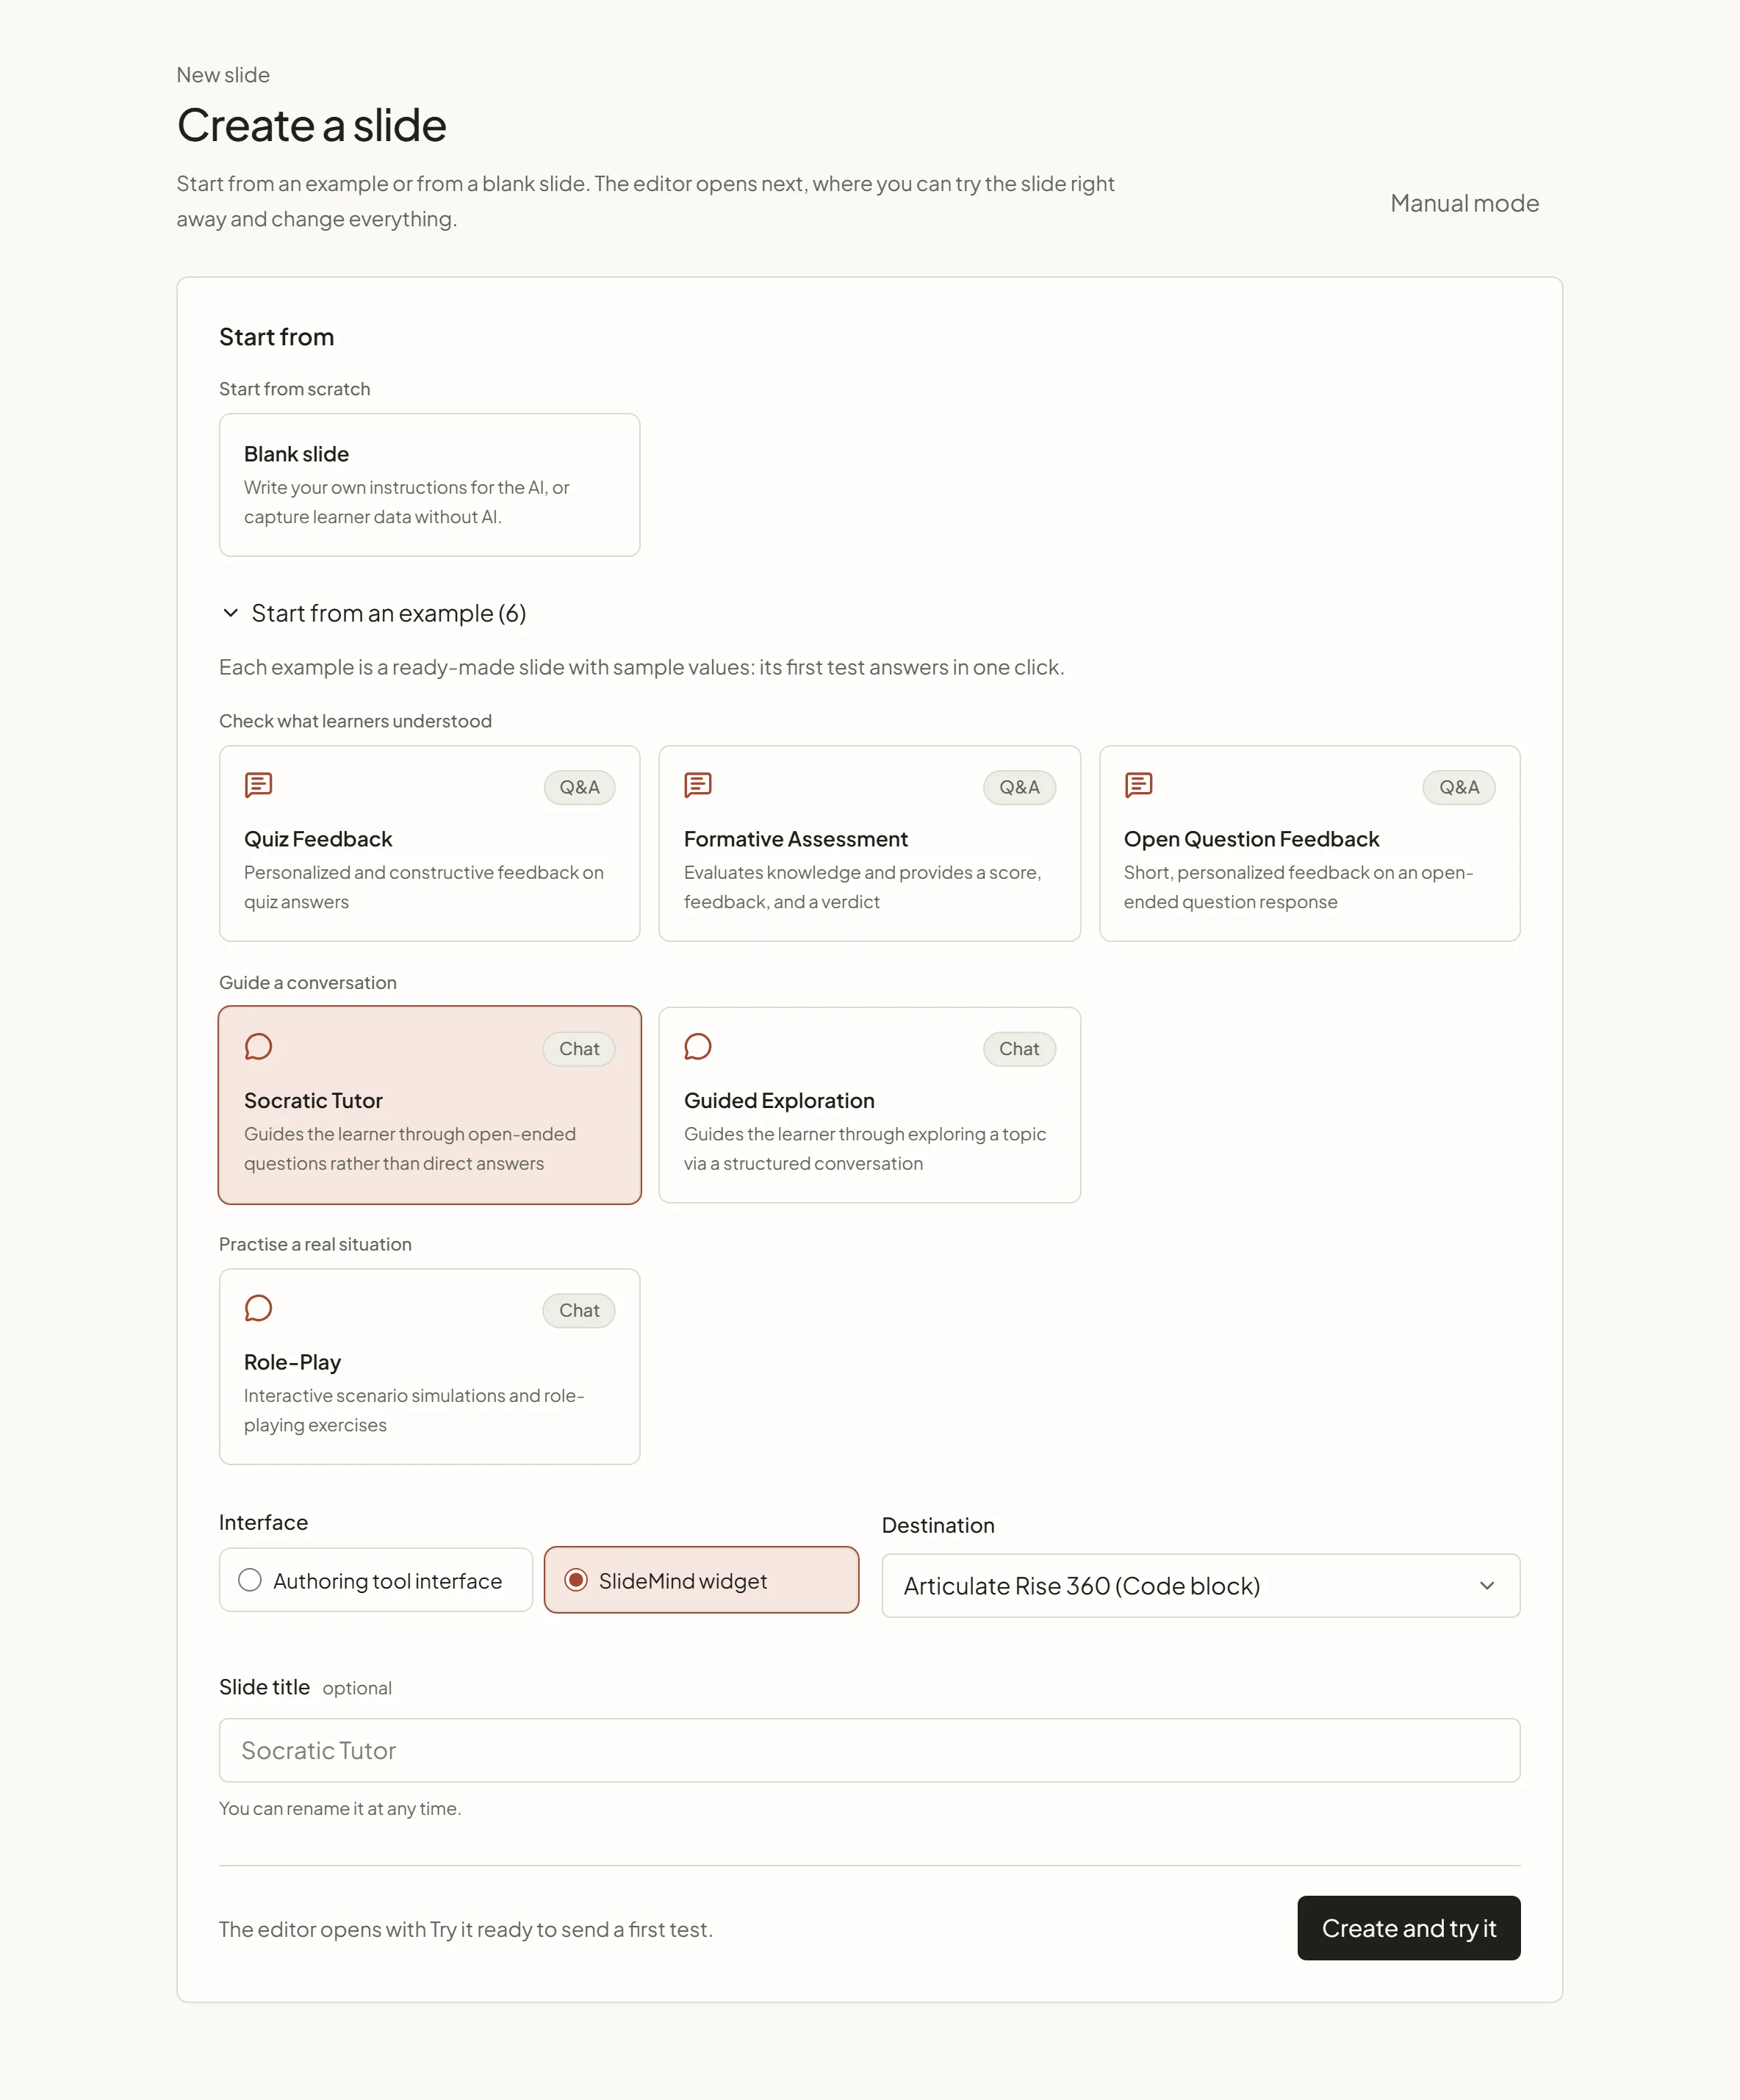
- On the Overview, select New slide (or the checklist button Create a slide). The Create a slide screen opens.
- Under Start from, Blank slide is selected. Open Start from an example instead, then select an example. Examples are grouped by use: Check what learners understood, Guide a conversation and Practise a real situation.
- Under Interface, select SlideMind widget. It is the quickest way to a first answer: you install the widget without creating any variable in your authoring tool.
- In Destination, select where the slide will run: Articulate Storyline (Web Object), Articulate Rise 360 (Code block) or HTML Widget (iframe).
- Optionally, type a Slide title. You can rename the slide at any time.
- Select Create and try it. The slide editor opens with the Try it panel ready, already filled with a sample learner message.
- Select Send and read the reply. It is the answer your learners will get.
The step is checked as soon as a test succeeds. If you already have a slide, the checklist button Try your slide opens it with Try it ready.
If you see No AI is connected to this workspace yet, select Set up AI (owners), or ask a workspace owner to turn on SlideMind Credits or add a provider key.
If you previously chose Manual mode on the Create a slide screen, New slide opens a short dialog instead. Select Start from an example in it to come back to the examples.
Publish the slide
Section titled “Publish the slide”A new slide is a Draft, and your course gets no answer from a draft. Publish it in either of these ways:
- In the slide editor header, open the status menu, which reads Draft, choose Published, then select Save slide.
- At the Installation step, the warning This slide is not published yet has a Publish button (Save and publish if you have unsaved changes).
Once the slide is published, each save updates what learners get. The checklist button for this step, Review your slide, opens your draft slide.
Add the slide to your course
Section titled “Add the slide to your course”The Installation step, at the end of the slide editor, holds what you add to your course: a ready-made Storyline slide (.story) or the integration code, with the setup steps for your destination. The checklist button Get your slide opens it for your published slide.
- Select Download the folder (.zip), then unzip it. You get a folder that holds
index.html. - In Storyline, choose Insert › Web Object, select that folder, keep Display in slide, then size the object on the slide.
- Publish the course to your LMS or to SCORM Cloud to test it.
Later changes to the slide’s instructions, look or layout apply without importing the folder again. See Articulate Storyline (Web Object).
- Select Copy the code.
- In Rise 360, add a Code block where the activity should appear.
- Paste the snippet into the block.
- Preview the lesson to try the activity.
See Articulate Rise 360.
- Select Copy the code. It copies an iframe.
- Paste it into an HTML or embed block of your page, LMS or course.
- Open the page to try it.
See HTML widget (iframe).
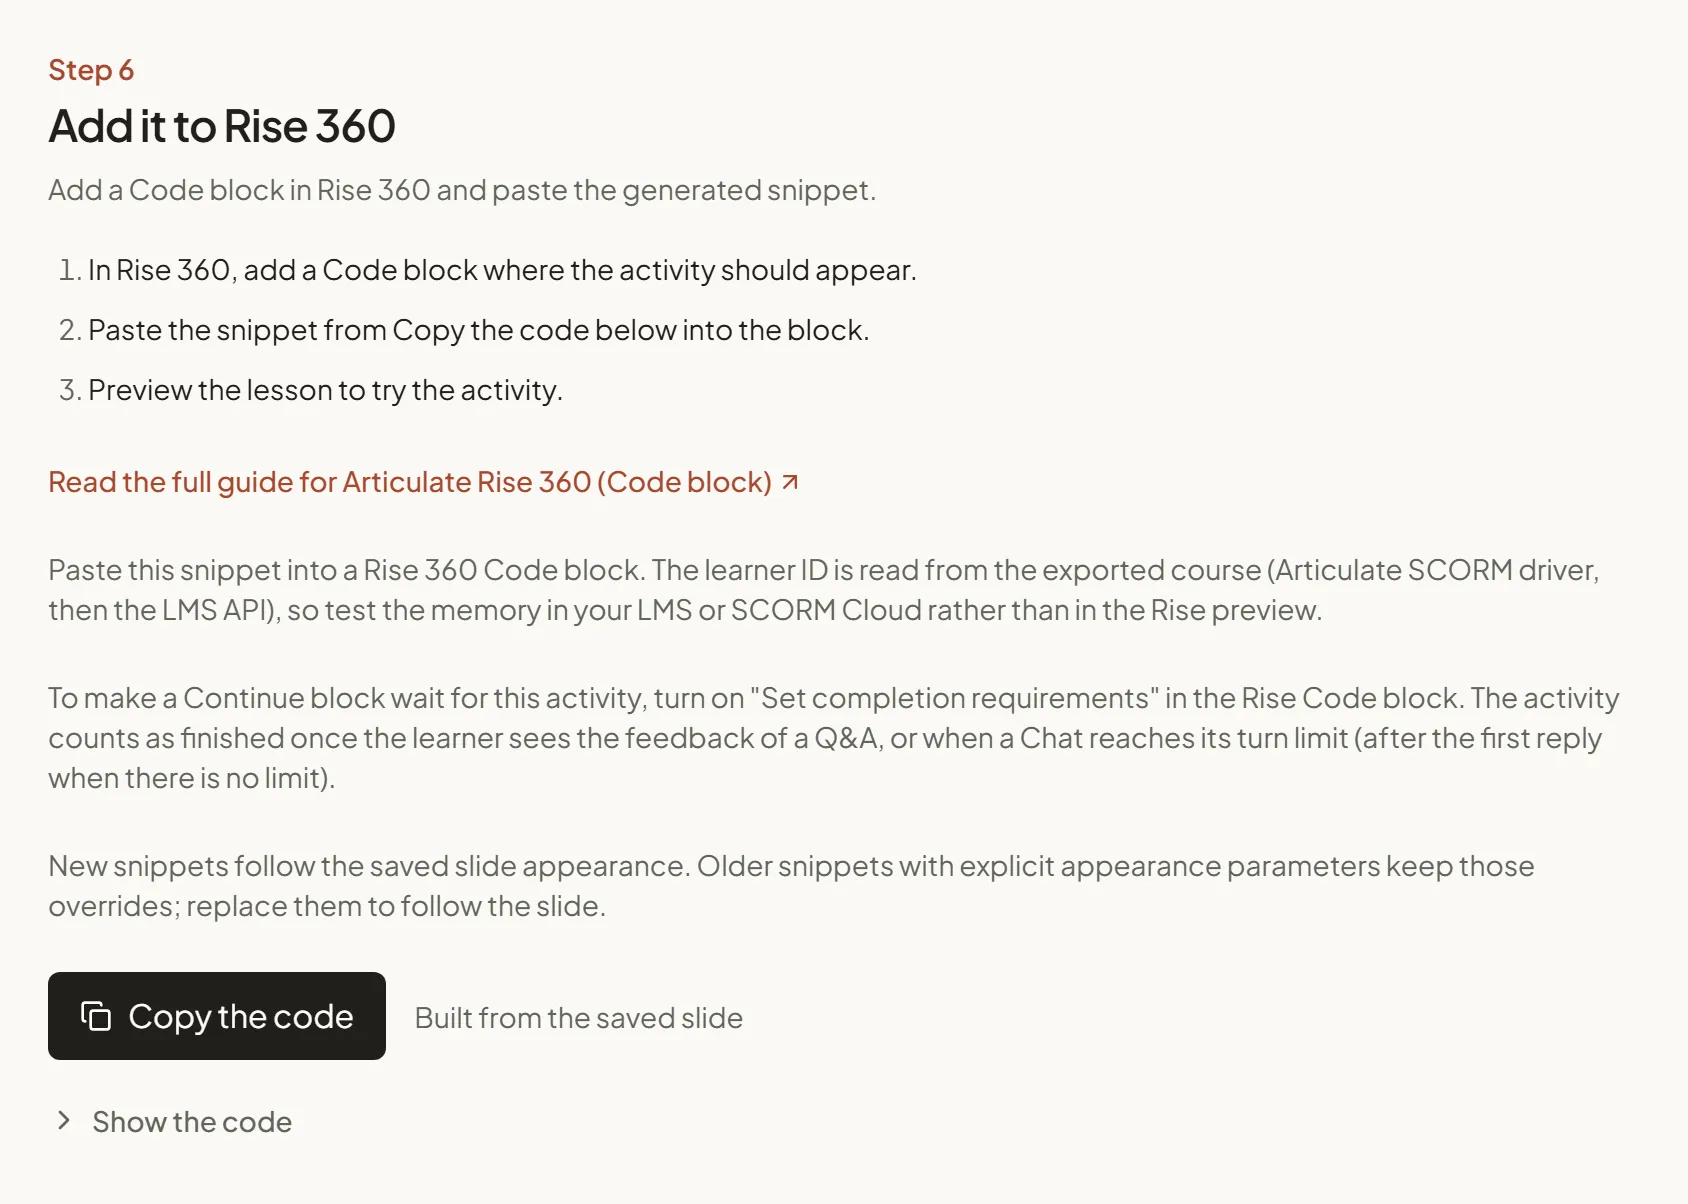
If the slide has unsaved changes, the button reads Save & copy the code or Save & download the folder: SlideMind saves the slide first. Select Show the code to read the code before you copy it. The checklist step is checked as soon as you copy the code, download the folder or download the ready-made Storyline slide (.story).
Using the authoring tool interface instead? With Storyline, the Installation step offers a ready-made slide to import, Download the slide (.story). With the other authoring tools, it lists the variables to create and the trigger to add. See the Integration overview.
Get a first answer from your course
Section titled “Get a first answer from your course”- Open your course where it is published: your LMS, SCORM Cloud, or the web page.
- Go to the screen with the slide and send a message.
This step completes on its own when the first answer reaches your course. Tests in Try it and the Sandbox don’t count. The Overview refreshes by itself, so you can keep it open in another tab. Its checklist button, See the setup steps, reopens the Installation step of your published slide.