

Integration overview
Once a slide answers well in Try it, you connect it to your course. This page explains the two interfaces and eight destinations SlideMind supports, where to get the integration code, and the rules that apply everywhere. It is written for course authors who install slides in an authoring tool, an LMS or a web page.
Two interfaces
Section titled “Two interfaces”Every slide runs through one of two interfaces. You choose it with the destination.
- Authoring tool interface (shown as Authoring tool in the Activity and destination dialog). You build the screen yourself in your authoring tool: a text entry field, a button, a text box. The integration code is JavaScript. It reads the learner’s text from an authoring tool variable, sends it to SlideMind, and writes the reply back into another variable. You keep full control of the design and can branch on the results.
- SlideMind widget. SlideMind provides the screen: a ready-made Q&A or Chat panel that you embed in your course. You style it in the slide’s Look step, it can show an AI notice, and its texts follow the Learner language.
Destinations
Section titled “Destinations”| Destination (as shown in SlideMind) | Interface | What you install | Status | Guide |
|---|---|---|---|---|
| Articulate Storyline | Authoring tool | A ready-made slide (.story) to import, or JavaScript in an Execute JavaScript trigger | Stable | Articulate Storyline (JavaScript) |
| Adobe Captivate | Authoring tool | JavaScript in an Execute JavaScript action | Beta | Adobe Captivate |
| Lectora | Authoring tool | JavaScript in a JavaScript action | Beta | Lectora |
| dominKnow | ONE | Authoring tool | JavaScript in a JavaScript action | Beta | dominKnow | ONE |
| iSpring Suite | Authoring tool | JavaScript connected to your course variables | Beta | iSpring Suite |
| Articulate Storyline (Web Object) | SlideMind widget | A folder (.zip) inserted as a Web Object | Stable | Articulate Storyline (Web Object) |
| Articulate Rise 360 (Code block) | SlideMind widget | An HTML snippet pasted into a Code block | Stable | Articulate Rise 360 |
| HTML Widget (iframe) | SlideMind widget | An <iframe> pasted into a page or an HTML block | Stable | HTML widget (iframe) |
Storyline appears twice on purpose. With the JavaScript destination the screen is a Storyline slide: a ready-made one, or your own. With the Web Object destination you insert the SlideMind widget and skip the JavaScript.
What each destination supports
Section titled “What each destination supports”| Authoring tool code (5 tools) | Storyline Web Object | Rise 360 Code block | HTML widget | |
|---|---|---|---|---|
| Q&A and Chat | Yes | Yes | Yes | Yes |
| Capture | Yes | Uses the Storyline JavaScript code | Advanced only | Advanced only |
| Values sent from the authoring tool | Yes | No | No | No |
| Structured results in a Q&A | Each field in its own variable | Each field in a Storyline variable | Score and verdict shown in the widget | Score and verdict shown in the widget |
| Structured results in a Chat | Each field in its own variable | Each field in a Storyline variable | No, the Chat answers in plain text | No, the Chat answers in plain text |
| AI notice | No, inform learners on your own screen | Yes | Yes | Yes |
| Appearance, Q&A layouts, learner language | Your own design | Yes | Yes | Yes |
| ”Activity finished” signal | …_done variable (Chat) | …_done variable | Set completion requirements in Rise | A message to the parent page (advanced) |
“Advanced only” means the capture relies on messages sent by the page around the widget, which only a developer can set up. See HTML widget (iframe).
Choose the destination
Section titled “Choose the destination”You pick the destination when you create a slide, and you can change it later:
- Open the slide in the slide editor.
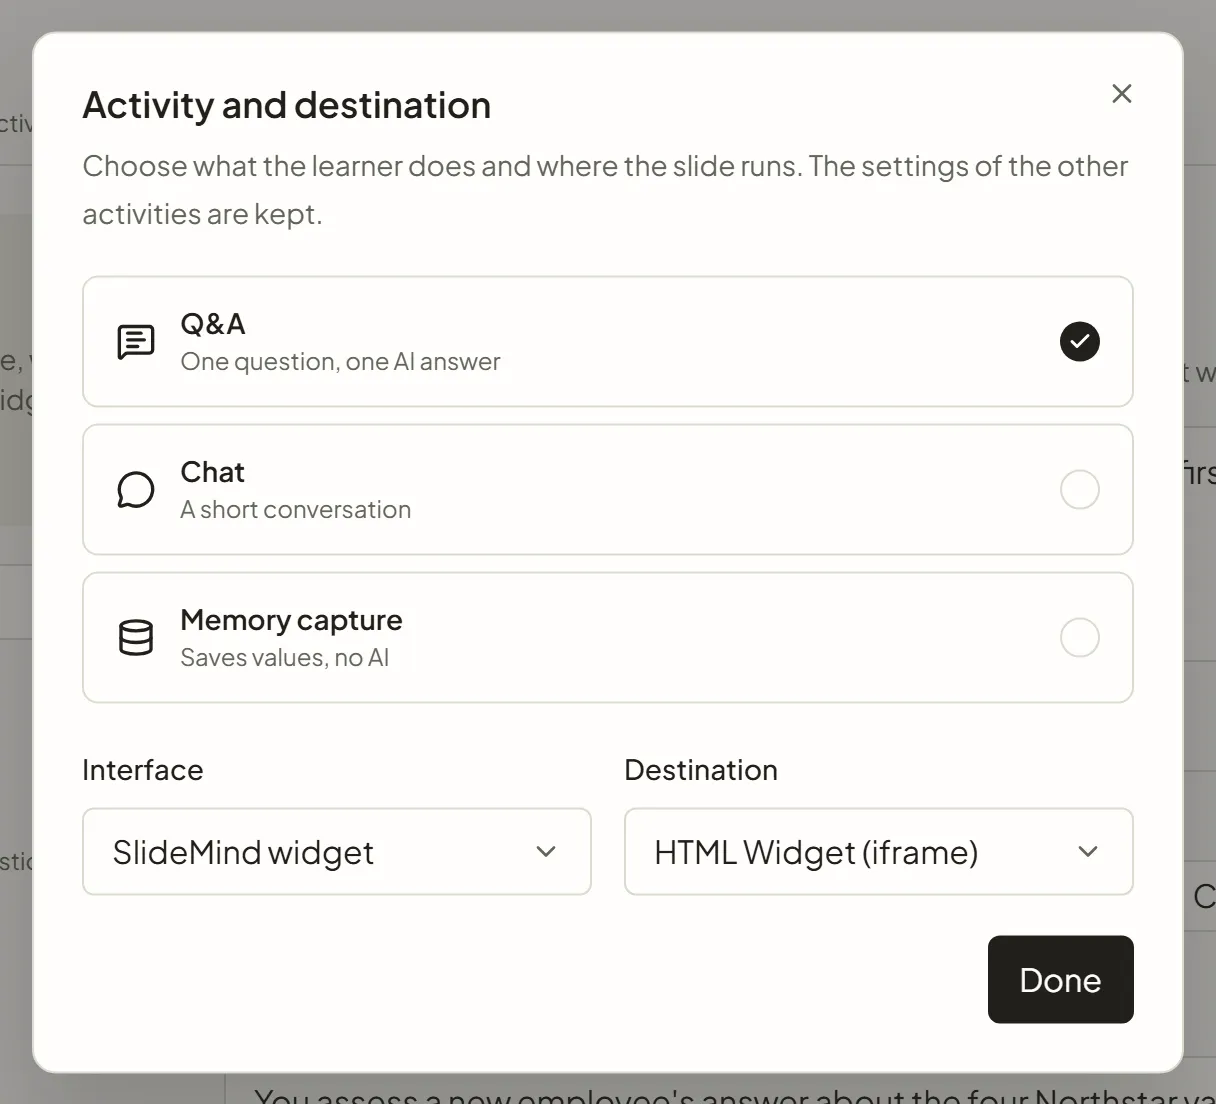
- In the Activity box, select Change. The Activity and destination dialog opens.
- Choose the activity (Q&A, Chat or Memory capture).
- Under Interface, choose Authoring tool or SlideMind widget. For a Capture slide, the field is called Integration method, with Authoring tool connection or Embedded capture.
- Under Destination, choose your tool, then select Done.
New slides start with the workspace default: Settings › Integrations › Default editor. Only the workspace Owner can change it.
Get the integration code
Section titled “Get the integration code”The last step of the slide editor is Installation. Its title names your destination, for example “Set it up in Captivate” or “Add it to Rise 360”.
- Open the slide and go to the Installation step.
- If you see This slide is not published yet, select Publish (or Save and publish when you have unsaved changes). Your course gets no answer from a draft.
- Follow the Setup steps listed for your destination. The variable names in the steps are shown exactly as you paste them in your authoring tool: click a name to copy it.
- For the authoring tool interface and the Storyline Web Object, check the variable names. Rename them now if you want, before the first copy.
- Select Copy the code, then paste the code in your authoring tool or page.
Two destinations start with a ready-made download instead:
- Articulate Storyline, for a Q&A or a Chat: the Ready-made Storyline slide card offers Download the slide (.story), a slide to import into your Storyline project. The setup steps and Copy the code move to the Manual setup section, and the variable names to Storyline variables. See Articulate Storyline (JavaScript).
- Articulate Storyline (Web Object): the Ready-made Web Object card offers Download the folder (.zip), a folder to insert as a Web Object. See Articulate Storyline (Web Object).
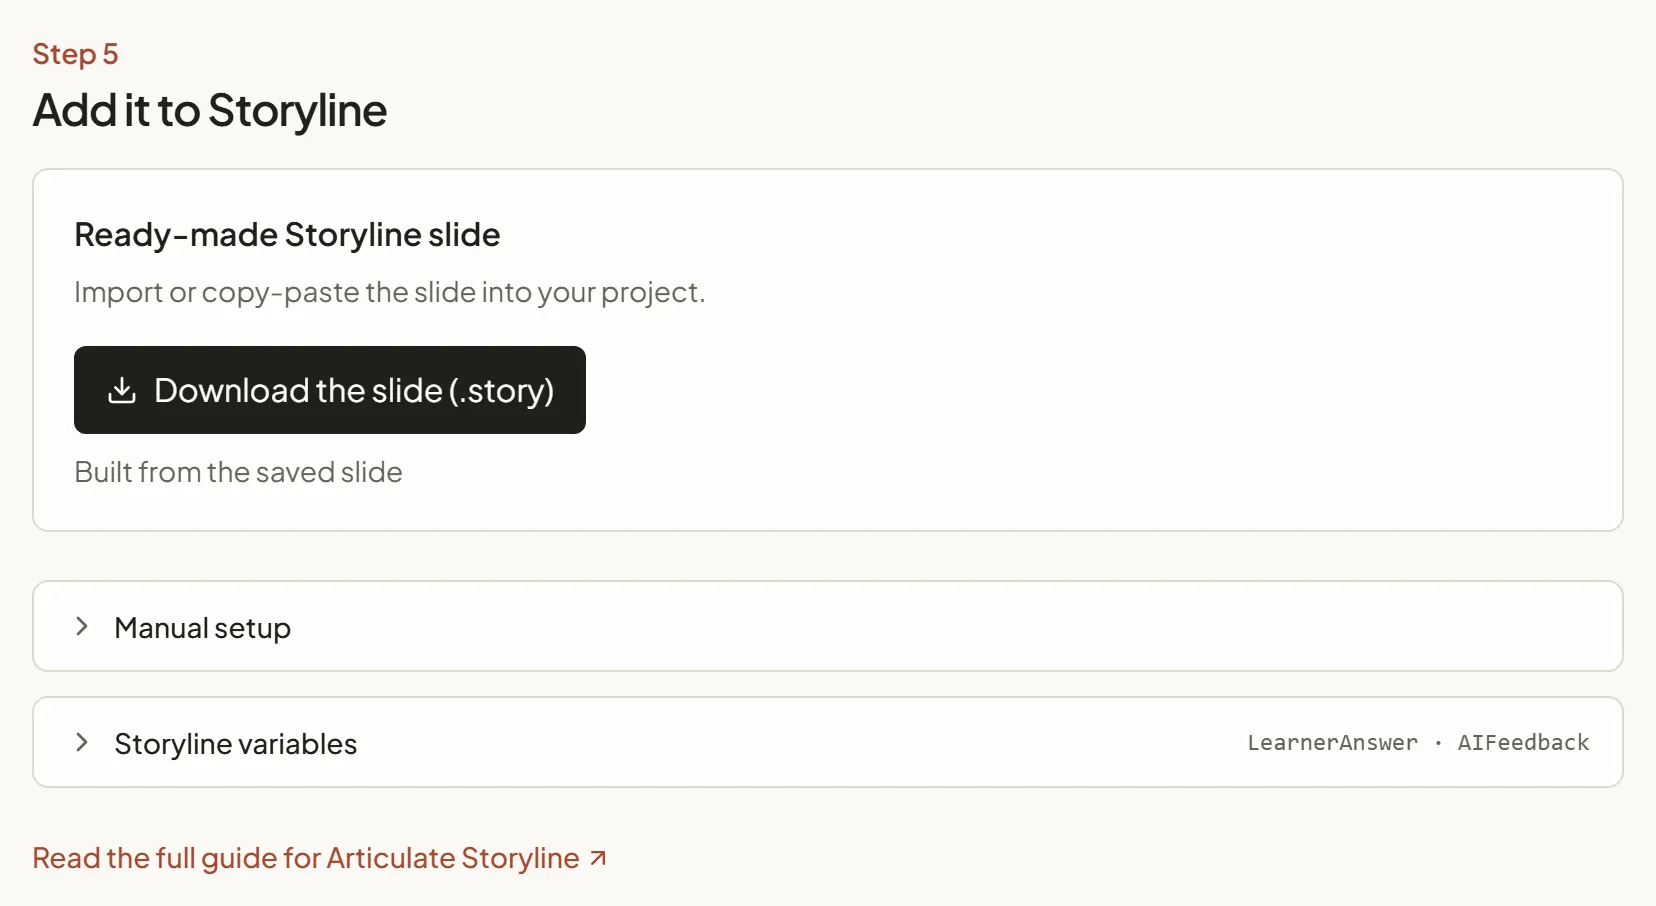
If the slide has unsaved changes, the button reads Save & copy the code (or Save & download the slide, Save & download the folder): it saves the slide first. The code is always Built from the saved slide. To read it before you copy it, open Show the code.
Under the steps, Read the full guide for … opens the guide of your destination on this site. The step ends with links to when to copy the code again and to the go-live checklist.
Publishing a slide and renaming its variables need the Owner or Editor role.
Shortcut from the Slides list
Section titled “Shortcut from the Slides list”On the Slides page, open the ⋯ menu at the end of a slide’s row:
- Copy the … code copies the code directly. The item names the destination, for example Copy the Articulate Storyline code or Copy the HTML Widget (iframe) code.
- For a Storyline Web Object, Download the Articulate Storyline (Web Object) folder downloads the folder instead.
- Installation steps opens the slide’s Installation step.
The shortcut uses the slide’s own destination and activity, or the workspace Default editor when the slide has none. It copies the code of the saved slide. Your course gets no answer until the slide is published.
Three rules for every destination
Section titled “Three rules for every destination”- Publish the slide. Only a published slide answers. A draft or archived slide gets no answer in your course.
- Test in the published course. Authoring tool previews do not always run JavaScript, and they never identify the learner. Test in your LMS or in SCORM Cloud. See Test before going live.
- Know what needs a new copy. Most changes apply to your course as soon as you save the slide. A few are frozen in the installed code and need a new copy or a new download. See Changing a slide after installation.
Before your first installation
Section titled “Before your first installation”- Connect the AI. Q&A and Chat slides need SlideMind Credits or your own provider key. See Choosing how AI is funded.
- List your allowed websites. Add the addresses of your LMS and course hosting in Settings › Integrations › Allowed origins. See Allowed websites.
- Plan how learners are identified. Learner memory works only for a learner the LMS (or an
sm_userparameter) identifies. See Identifying learners. - Mind the language. The AI replies in the language of your instructions. The widget’s Learner language only sets the buttons, labels and messages around the reply. See Appearance and language.