

Create a slide
A slide is one AI interaction configured in SlideMind. This page shows how to create one from an example, a template or a blank slide, and how to duplicate or delete slides.
Where to start
Section titled “Where to start”You can create a slide from several places. They all open the same Create a slide screen, unless you use manual mode:
- Slides › New slide.
- New slide on the Overview page.
- New slide on a module page. The slide is added to that module.
- New slide (course level) on a course page. The slide is attached to the course without a module.
- Use this template on a card of the Templates page. That template is preselected.
Viewers can’t create slides. They see “Your workspace role can view slides but cannot create them.”
Create a slide from the creation screen
Section titled “Create a slide from the creation screen”- Under Start from, Blank slide is already selected. To start from an example instead, open Start from an example (followed by the number of examples) and select one.
- For a blank slide, choose the Activity: Q&A, Chat or Memory capture.
- Check the Interface (Integration method for a capture) and the Destination. They are prefilled from the workspace’s Default editor setting. See Activity types to choose.
- Optionally, type a Slide title. If you leave it empty, the slide takes the title of the example or template, or “Untitled slide” for a blank slide. You can rename it at any time.
- Select Create the slide for a blank slide, or Create and try it for an example or a template.
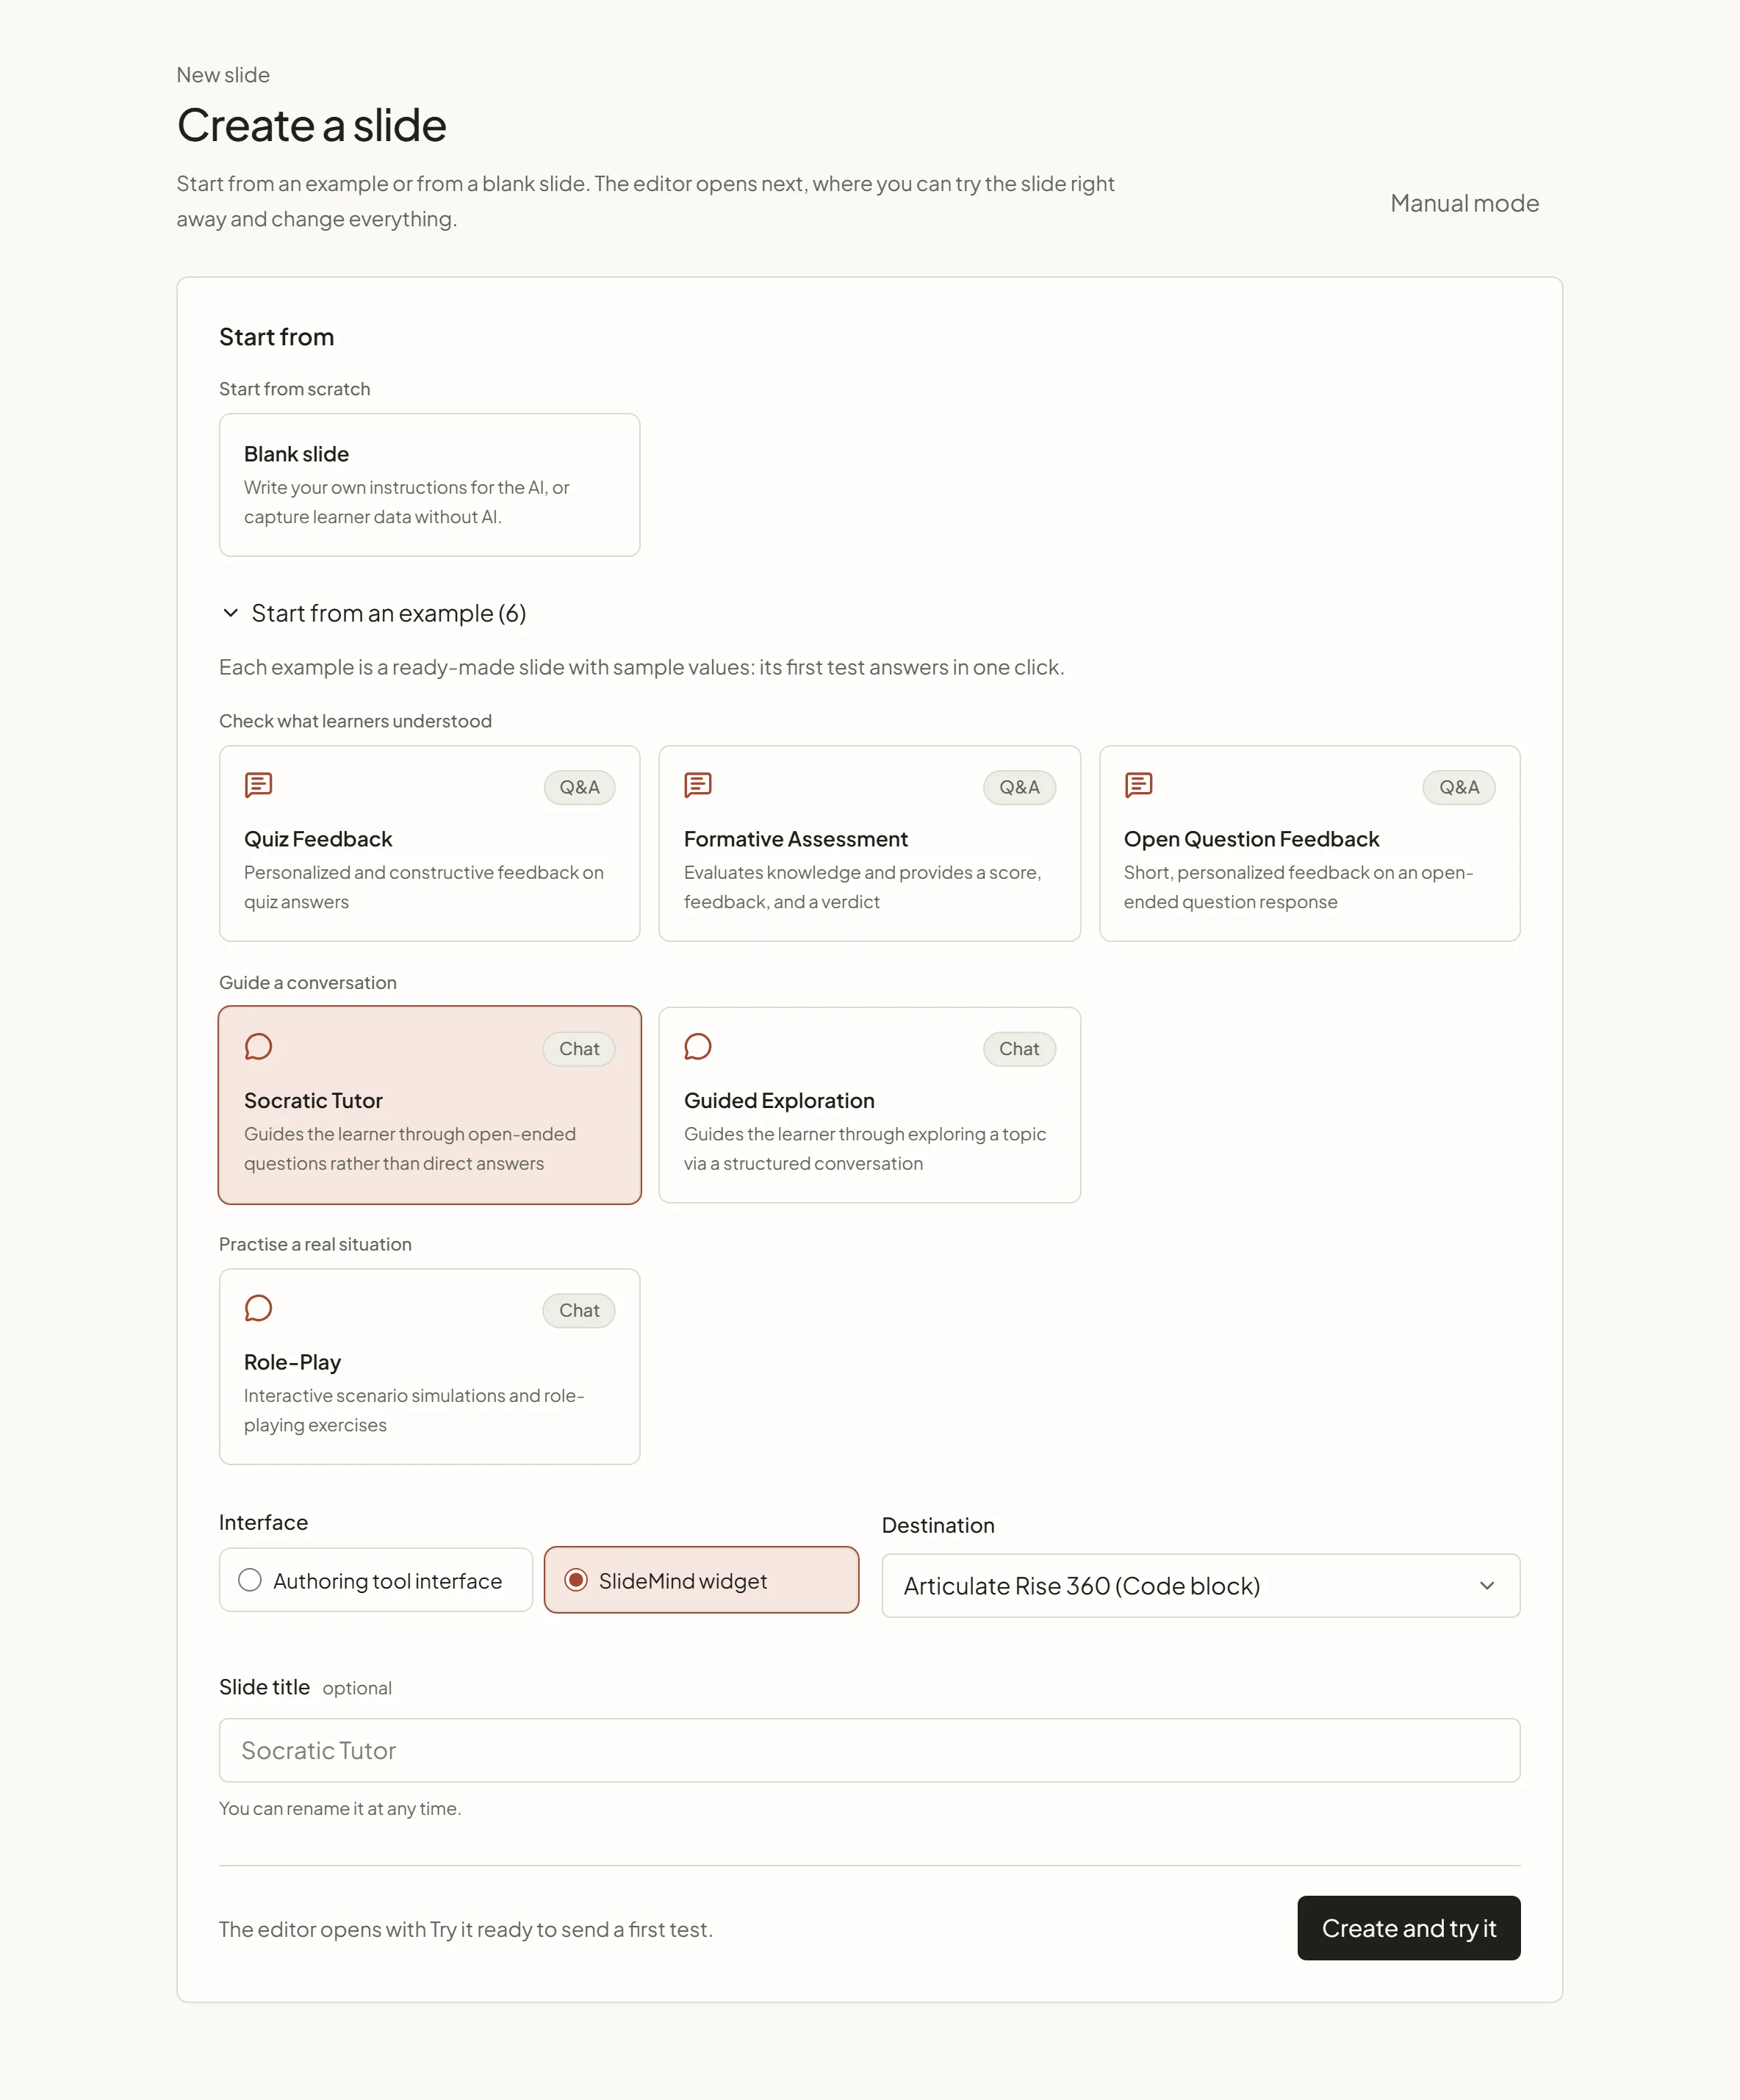
When you start from a module or a course page, the hint under the title says where the slide goes, for example “The slide is added to Employee onboarding › Module 1 — Welcome.”
Start from an example
Section titled “Start from an example”The examples are folded under Start from an example: select it to show them. Each example is a ready-made slide with sample values, so its first test answers in one click. Examples are grouped by what you want to do:
| Group | Example | Activity | What it does |
|---|---|---|---|
| Check what learners understood | Quiz Feedback | Q&A | Personalized and constructive feedback on quiz answers |
| Formative Assessment | Q&A | Evaluates knowledge and provides a score, feedback, and a verdict | |
| Open Question Feedback | Q&A | Short, personalized feedback on an open-ended question response | |
| Guide a conversation | Socratic Tutor | Chat | Guides the learner through open-ended questions rather than direct answers |
| Guided Exploration | Chat | Guides the learner through exploring a topic via a structured conversation | |
| Practise a real situation | Role-Play | Chat | Interactive scenario simulations and role-playing exercises |
Each card shows the activity’s icon and name. The example’s instructions already use the course and module variables, with fallback text for slides that have no course or module yet.
The other examples work with both interfaces. Role-Play gives {{role}} and {{scenario}} a fallback, and Formative Assessment and Open Question Feedback give {{question}} a fallback that points to the question shown to the learner. A Q&A example created for the SlideMind widget shows its sample question to learners: replace it with yours in the Question step. See Variables in prompts.
Start from your template
Section titled “Start from your template”When you select Use this template on a template card of the Templates page, the examples are shown open, and that template appears under Your template, already selected. If it is one of the built-in examples, it is selected in its own group instead. See Templates.
Start from scratch
Section titled “Start from scratch”Blank slide, under Start from scratch, is selected when the screen opens: “Write your own instructions for the AI, or capture learner data without AI.” Choose the Activity:
- Q&A: a single learner question followed by one focused AI response.
- Chat: a multi-turn conversation for coaching, practice or role-play.
- Memory capture: collect learner data without calling an AI model.
If the examples fail to load, the screen says so, and you can still start from a blank slide.
What opens next
Section titled “What opens next”The slide editor opens on your new slide:
- From an example or a template: the Try it panel opens, ready to send a first test. For an example, the learner’s message and the values are already filled in. Each test is a real AI call, billed like a learner’s. See Try it.
- From a blank slide: the editor opens on the step to fill in first, Instructions for Q&A and Chat, or Values to remember for Capture.
Every new slide starts as a Draft. Your course gets no answer from a draft, so publish the slide before you test the integration code in your course. See The slide editor.
Use manual mode
Section titled “Use manual mode”Manual mode creates a slide from a short dialog, where you also choose its course or module.
- On the Create a slide screen, select Manual mode. The New slide dialog opens.
- Enter the Slide title. It is required in this dialog.
- Optionally, choose the Attachment. Type to search courses and modules, or keep Independent slide.
- Optionally, choose a template under Start from a template. Built-in templates end with ”· built-in”. Keep Blank slide to start empty.
- Select Create slide. The slide editor opens.
A blank slide created this way is a Q&A slide. To pick another activity, select Change in the editor’s Activity box.
Your browser remembers this choice for the workspace: the next New slide opens the dialog directly. To go back to the creation screen, select Start from an example in the dialog.
Duplicate a slide
Section titled “Duplicate a slide”- Open the slide.
- Open the Actions menu (the ⋯ button in the header) and select Duplicate.
You can also select Duplicate in the ⋯ menu of a row on the Slides page.
From the editor, the copy opens right away. From the Slides page, it appears in the list. The copy starts as a Draft, keeps the same course or module, and gets its own integration code: to use the copy in a course, install the copy’s code. If the slide keeps its exchanges in the learner’s memory, the copy uses new keys based on its own title, so the two slides don’t overwrite each other’s values.
Delete a slide
Section titled “Delete a slide”Open the slide, then select Actions › Delete slide. On the Slides page, you can also select Delete slide in the ⋯ menu of a row.